
To install a garden sail so it gives the most shade, start by finding strong anchor points-such as house walls, reinforced fascia, or solid posts-and fixing the fabric with proper tensioning parts like turnbuckles or pulleys.
You are doing more than hanging a sheet; you need to think about how the sun moves so the shaded area matches your seating space during the hottest times of day, then pull about 100 to 150 pounds of tension on each corner. This tight pull creates a firm, drum-like surface that blocks UV rays and stops the fabric from flapping or sagging, which helps with both safety and long life.
By following a clear step-by-step plan, you can change a hot patio into a cool, airy spot. The main work is in the preparation: choosing good materials, sinking posts deep enough to handle wind, and setting a proper slope so rain can run off.
Whether you love DIY or only do the odd weekend project, learning the basics of tensioned fabric structures is the first step to a good installation.
What Is a Garden Sail and How Does It Protect Against the Sun?
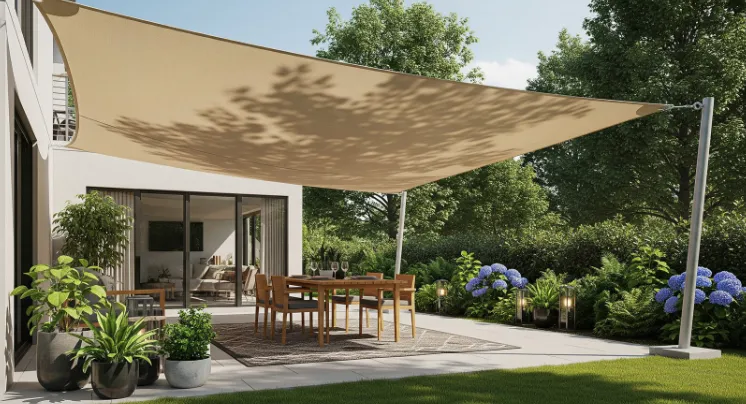
A garden sail, also called a shade sail, is a flexible outdoor canopy based on the idea of ship sails. These canopies are usually made from strong, weather-resistant fabrics such as High-Density Polyethylene (HDPE) or PVC-coated polyester.
Unlike standard umbrellas or heavy pergolas, a garden sail from Shade4You gives a light, modern look that can be made to fit almost any space, from small balconies to large gardens. They are pulled tight between several anchor points to form a floating “roof” that offers strong cooling and shade.
These sails do more than add style. They act as a working shield against sun and weather. Because they are pulled tight, they stay stable in moderate winds and do not need heavy brickwork or permanent roofs that make outdoor projects expensive and slow. You can also hang them in many creative ways-layered, crossed, or at different angles-giving design options that fixed structures cannot match.
Benefits of Installing a Garden Sail
The main benefit of a garden sail is its power to lower the temperature under it. By blocking direct sunlight, a sail can make a patio feel up to 15 degrees cooler, letting you use the space for longer each day. They also boost the look and value of your home, adding a simple but stylish feature that fits both modern and classic gardens.
Garden sails are also very flexible. If you have an odd-shaped deck or a garden with big trees or strong walls, you can use these as anchor points, which cuts down on extra building work. They are semi-permanent, too; many people take them down in winter to protect the fabric, making them a good option for areas with changing seasons.
How Garden Sails Block Harmful UV Rays
The sun protection from garden sails comes from the way the fabric is woven. Most good-quality sails block about 90% to 98% of harmful UV rays. This protection helps reduce sunburn and long-term skin damage, especially between 11 am and 3 pm when the sun is highest and strongest.
UV-stabilized plastics in the fabric are made to handle many years of sunlight without breaking down or losing their shielding effect.
The fabric can also affect how hot it feels. Breathable HDPE has tiny gaps that let hot air rise through the material, which helps avoid a “greenhouse” feel underneath. This airflow, along with blocking direct rays, creates a safe, comfortable place for children and adults to spend time outdoors without overheating.
Which Type of Garden Sail Gives the Best Sun Protection?
Choosing the best sail depends on your climate and the look you want. Fabrics and shapes differ; for example, a sail used in a wet, windy coastal area may need to be different from one used in a hot, dry region. The best protection is the one that handles both UV rays and the stresses from your local weather, such as strong winds or heavy rain.
When you shop, you will see different fabric weights and weaves. Heavier fabrics (measured in grams per square meter, or GSM) usually block more UV and are stronger under tension. But they also pull harder on their fixings and catch more wind, so they need stronger anchor points and hardware.
Common Materials Used in Shade Sails
The two main materials are HDPE (High-Density Polyethylene) and PVC-coated polyester. HDPE is the standard choice for breathable sails. Its knitted structure is very tough and stands up well to rot, mold, and tearing. Because air and water can pass through, it is ideal for windy areas where solid fabric would act like a big kite and rip anchors out.
PVC-coated polyester is the usual choice if you want a waterproof sail. While HDPE lets some rain pass through as a fine mist, PVC blocks water fully. This makes it popular for commercial spaces or above furniture that must stay dry. Professional suppliers like Shade4You recommend that these waterproof versions be installed at a much steeper angle, otherwise water will pool and may overload the fabric and fittings.
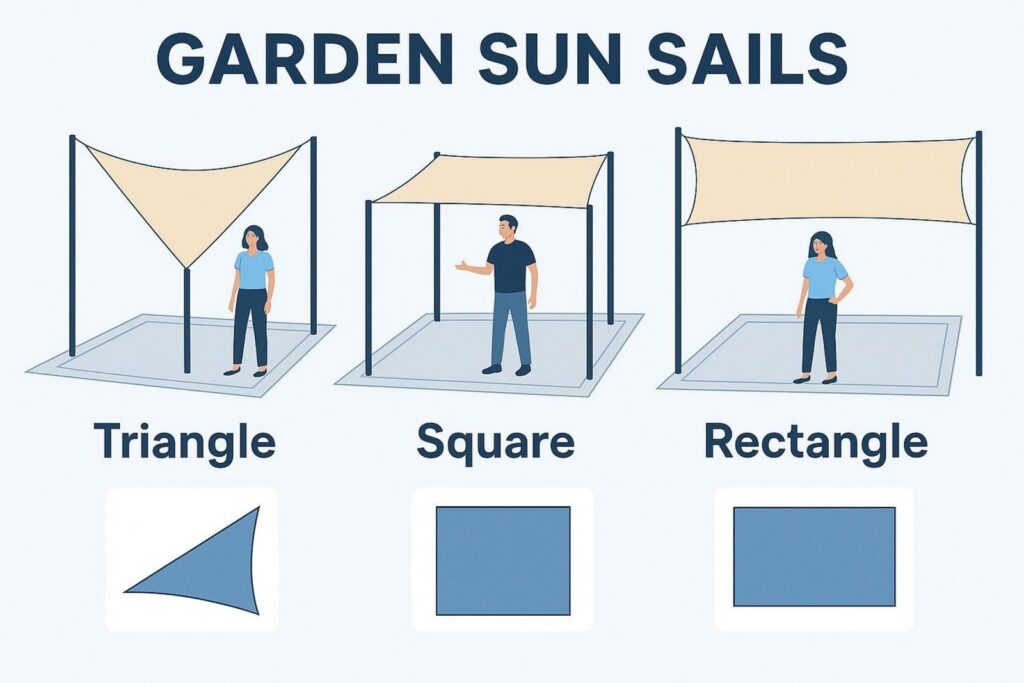
Comparing Shapes: Rectangle, Triangle, and Square
Triangle sails are very popular because they look bold and are easy to fit into awkward spaces. They need only three anchor points and work well in tight corners. However, a single triangle usually gives less shade-sometimes under 50%-compared with a square or rectangle of similar size. Many designers suggest using two or more triangles together to get enough coverage and create an attractive “Hypar” twist.
Rectangular and square sails are the main shapes for strong shade. They give wide, even coverage and are great for eating areas or poolside spaces. With four corners, you have more options to pull the fabric into a stable shape, such as a hyperbolic parabola (two corners high, two low), which handles wind and rain very well.
Choosing UV-Resistant and Weatherproof Fabrics
If maximum sun protection is your goal, choose fabrics with a tested UPF (Ultraviolet Protection Factor). UPF 50+ is the highest rating and means the cloth blocks more than 98% of UV rays. Also check for “solution-dyed” or “mass-dyed” fibers-this means the color runs through the whole thread, not just on the surface, so it fades less and stays bright for years.
Weather resistance covers more than just rain. In coastal areas you need resistance to salt in the air, and by pools you need resistance to chlorine. Choose a sail with reinforced webbing around all edges and marine-grade stainless steel D-rings in the corners. These parts are key to keeping high tension without the sail sagging over time.
How to Select the Best Location for Maximum Sun Coverage
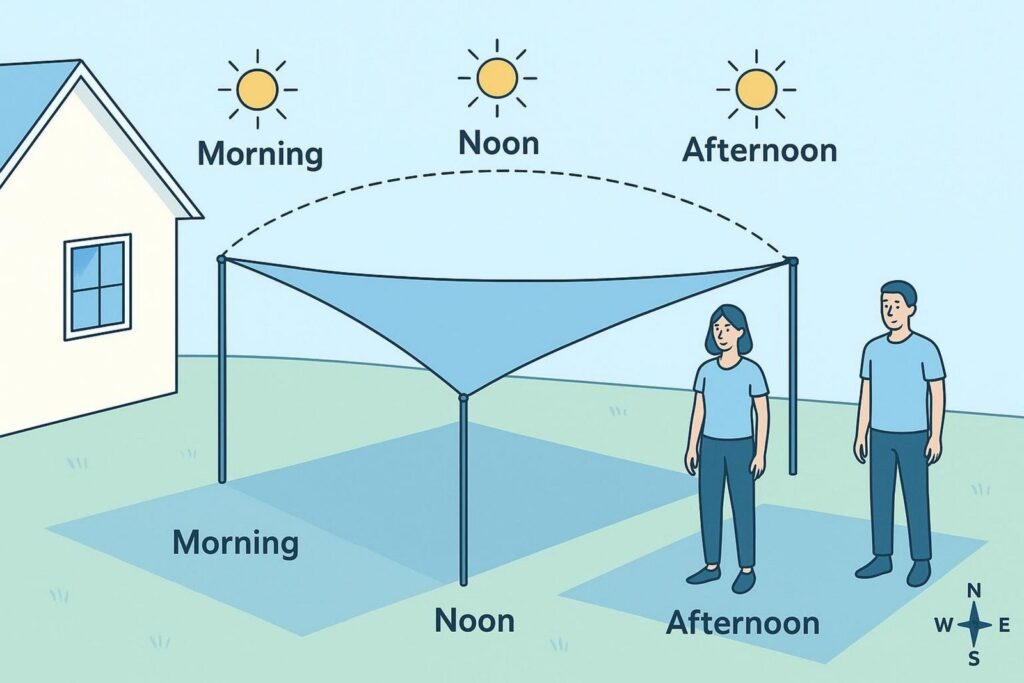
Placement is one of the most important parts of the job. A perfectly fitted sail is useless if the shade lands on the wrong spot. The sun moves from east to west and sits higher or lower in the sky depending on the season, so the shade underneath the sail moves too-it is only directly under the sail around midday in mid-summer.
Before you dig or drill, spend a few days watching how the sun moves across your garden. Check where the sun hits at noon and again around 4 pm, which is often the hottest time. Use what you see to choose the best direction and tilt for your sail.
Measuring Sun Path and Shade Throughout the Day
To get the best protection, plan mainly for the summer solstice, when the sun is highest and strongest. In the Northern Hemisphere, the sun sits more to the south, so stretching your sail’s footprint more to the south and west usually gives better afternoon shade. You can use sun-path websites or phone apps to see where shade will fall at different times of year.
As the sun’s angle changes, so does the length and position of the shadow. A very high sail throws a long shadow that moves a lot during the day, while a lower sail gives a tighter patch of shade that moves less. You want a balance between enough height for headroom and low enough mounting for solid shade coverage.
Taking Measurements and Planning for Coverage
Once you pick a general spot, lay a garden hose or string on the ground to trace the shape of the planned sail. This helps you picture the size and check that it will not block views or collide with trees, doors, or other features. When taking final measurements, always measure from “anchor point to anchor point.”
A common mistake is buying a sail the exact size of the area. You need space for the tensioning hardware and for the small stretch in the fabric. As a guide, leave about 12 inches (300 mm) at each corner between the sail’s D-ring and the anchor point. This gives your turnbuckles enough room to pull the sail tight.
Avoiding Obstacles and Hazards (Trees, Utilities, Structures)
Before you confirm your layout, check above and below the area. Do not place sails directly above barbecues, fire pits, or other strong heat sources, as heat and smoke can damage the fabric and increase fire risk. Check for overhead power lines and keep generous space between them and the sail so they cannot touch in strong winds.
Underground, you must be aware of buried services. If you are installing posts, contact your local utility providers so they can mark water, gas, or power lines. Hitting a main line is dangerous and can be very costly to fix. When attaching to the house, fasten anchors into real structural parts-studs, beams, or brick-not just into thin cladding or trim.
What Are the Steps to Prepare for Garden Sail Installation?
Good preparation is what makes a sail last 10 years instead of failing in the first big storm. You need the right tools and proper hardware made for high tension. Light-duty hooks from a normal DIY aisle are often too weak for the loads a shade sail produces, which can be 50 to 150 pounds or more on each corner.
You also need to prepare the site. This may mean strengthening your fascia board or digging deep holes for posts. If anchors shift over time, the sail starts to sag, so taking care at this stage saves trouble later.
Essential Tools and Installation Hardware
A basic kit should include marine-grade (316) stainless steel parts: pad eyes for walls, heavy-duty turnbuckles, D-shackles, and possibly wire rope or chain to extend corners. For tools, you will need a power drill with masonry or wood bits, a level, a wrench or socket set, and a safe ladder. If using posts, you will also need a post-hole digger or auger and a wheelbarrow for mixing concrete.
One tool that makes the job easier is a ratchet strap. It lets you pull the sail close to the anchor so you can attach the turnbuckle without heavy lifting. For very large sails, many installers use a “come-along” winch to get enough pre-tension safely.
Checking Local Regulations and Safety Rules
Before you start work, contact your local building office or Homeowners Association (HOA). Some areas have rules about the height and total size of temporary outdoor structures, and you might need a permit for bigger sails. In regions with hurricanes or very strong winds, there may be rules about how deep posts must be or what size they should be.
Safety is always the priority. Wear gloves when handling steel cables to avoid small sharp wire strands. Have someone hold the ladder while you work at height. Brace any posts until the concrete sets fully, which usually takes at least 48 hours.
Selecting and Marking Anchor Points
Your anchor points must be very solid. Good options include brick corners of houses, structural beams above windows, or large trees with a trunk at least 10 inches across. If fixing to a wooden fascia, use a fascia support bracket that ties into the roof rafters, because regular fascia boards alone can pull away under the load of a tight sail.
Mark each anchor clearly with chalk or pencil. For posts, mark the ground and measure diagonals. For a square or rectangle, both diagonal measurements should match-this shows the layout is “square,” which helps the sail tension evenly and reduces wrinkles.
How to Install a Garden Sail for Maximum Sun Protection
The installation stage is where all your planning pays off. Your aim is a “drum-tight” finish. A loose sail is risky; it will flap in the wind, causing sudden shocks that can snap fittings or damage walls. Follow these five steps to get a strong, neat result with good shade and long life.
The last corner is usually the hardest to connect. As you tighten the first three, the sail pulls tight and the final corner takes more effort. This is when ratchet straps and pulleys make the job much easier.
Step 1: Secure Posts, Poles, or Wall Anchors
For posts, use the rule “one-third in the ground, two-thirds above.” For a 10-foot finished height, use a 15-foot post with 5 feet buried. Dig holes at least 12 inches wide and 3-4 feet deep. Put 4 inches of gravel at the bottom for drainage, set the post, then fill the hole with concrete. Angle the posts away from the center of the sail by about 5-10 degrees so they better resist the pull from the sail.
For wall anchors, drill into solid structural parts. In brick, use expansion bolts or chemical anchors so the pad eye cannot move. In wood, use long lag bolts that reach well into the studs or beams.
Step 2: Attach Fixings and Hardware Kits
After the concrete has set for at least 48 hours, attach your hardware. Screw pad eyes into the wall or fit eye-bolts through the posts. Point the “eyes” directly toward the middle of the planned sail so the pull is straight. This helps stop twisting or bending of the fittings.
Attach turnbuckles to the anchors and open them to their longest setting. This gives you the most room for tightening later. If a corner of the sail is far from the anchor, use stainless steel wire rope or chain to bridge the distance.
Step 3: Fix the Garden Sail to Anchors
Lay the sail out on a clean surface such as a tarp. Clip the first corner to its hardware. Move to the opposite corner and use a ratchet strap or rope to pull the sail close enough to hook it into the turnbuckle. Repeat at the other corners.
At this point, the sail will hang a bit loose but should sit where you planned. Check that seams face down and that any labels are on the underside. If you are creating a “Hypar” twist, make sure the high and low corners are placed correctly before you start tightening.
Step 4: Adjust Tension Evenly for Wind and Rain Run-Off
Begin tightening the turnbuckles. Do not fully tighten one corner while leaving the others loose. Instead, move around the sail, giving each turnbuckle a few turns at a time so the load spreads evenly across the fabric. Aim for about 100-150 pounds of pull at each corner.
As you tighten, the center will rise and wrinkles will smooth out. If your sail is waterproof, check the slope now. You need roughly a 25-30% drop (around 3 feet of fall for every 10 feet of distance) so rain runs off rather than pooling in the middle.
Step 5: Check Stability and Safety
When the sail is tight, push firmly in the center. It should feel solid and move only a little. Check that all shackles and D-rings are tight and that turnbuckles are locked with lock-nuts or safety pins if supplied. If you used shackle pins, wrap a short length of wire through the pin and around the body to stop it unwinding over time.
Look closely at each anchor point for movement. If a post leans or a wall fitting pulls away, ease off the tension and strengthen that point before tightening again. A good installation will look clean, feel firm, and stay quiet even in a breeze.
Tips to Improve Sun Protection and Sail Longevity
Day-to-day care is easier than the first setup, but you still need to check the sail now and then. The main causes of damage are loose tension and water pooling. If you stay on top of these issues, you can often double the life of the sail. Quality products can last 5-15 years, but poor upkeep can cut this down to just a few.
Local conditions matter too. In dusty areas or near the sea, dirt and salt can build up in the weave and weaken the fabric. Rinsing the sail every few months helps keep the UV protection working well and keeps the fabric in good shape.
Maintaining Proper Tension to Prevent Sagging
In the first weeks, the fabric will stretch a little. This is normal, but it means you must re-tighten the turnbuckles to keep that “drum-tight” feel. A slack sail can “buffet” in the wind-the fabric whips back and forth, creating strong shock loads that can break even stainless steel parts.
Check the tension at the start of each season. If you see wrinkles running between corners, it is time to tighten. Keeping the sail tight lets the curved edges (the “gore”) spread the tension evenly through the fabric.
Recommended Angles and Heights for Maximum Shade
For better shade and looks, avoid mounting all corners at the same height. A flat sail looks dull and is less stable. By changing the height of the corners by at least 3 feet, you create a 3D shape that cuts the wind better and sheds rain more easily. This is the “Hypar Twist” that many professionals use.
If late-afternoon sun still hits your seating area from the side, you could add a vertical “privacy” panel on that side or lower one of the corners. Some people install several attachment points at different heights on the same post so they can move the corners up or down with the seasons.
Preventing Water Pooling and Wind Damage
Pooling water is the most common cause of failure in waterproof sails. One gallon of water weighs over 8 pounds, so a large puddle can weigh hundreds of pounds, stretching the fabric or ripping out anchors. Always keep a strong slope. If you notice water building up during rain, tighten the sail more or lower one corner to increase the fall.
Most sails rated and installed correctly can handle winds of about 30-40 mph. But if a big storm or cyclone is on the way, the safest choice is to take the sail down. Most fixings, such as snap hooks and turnbuckles, are made so you can remove the sail in just a few minutes.
Troubleshooting Common Installation Problems
Even with careful planning, you might run into problems during or after installation. The good news is that most of them are easy to fix if you act early. Do not ignore early signs such as small shakes, rattles, or wrinkles-these can turn into bigger issues after a windy day.
Most fixes come down to adjusting the balance of tension. Each corner pulls against the others, so when you change one, you change them all. Learning to “read” the fabric-where it sags or creases-will show you which corner needs more or less pull.
Fixing Loose or Flapping Sails
If the sail flaps or makes a “thumping” sound, it is usually too loose. Check the turnbuckles first; they may have slowly undone. If they are already fully tight and the sail still sags, move the anchor points further apart or add a short chain section to give more room for tightening.
A poor angle can also cause flapping. A sail that is too flat lets wind get underneath and lift it. Increasing the height difference between corners often fixes this by changing how the air flows over and under the sail.
Addressing Uneven Shade or Coverage Gaps
If you have bare patches where the shade does not reach, the inward curve of the edges (the “gore”) may be more than you expected. All sails have these curves to spread tension. To cover a specific area fully, you may need to overlap two sails. Leave at least 18 inches of height difference between overlapping sails so they do not rub together in the wind.
If the shade falls in the wrong place, remember that the sun and shadow shift throughout the day. You may need to move the whole sail a few feet. This is why using string to mark out the sail and test the shade pattern before digging post holes is so helpful.
Solutions for Weak or Insecure Anchor Points
If an anchor point moves, stop and reduce the tension straight away. For wooden posts that lean, you may need to dig around the back of the base and add more concrete or fit a guy wire for support. For brick fixings that begin to pull out, upgrade to a bigger expansion bolt or use a high-strength chemical anchor.
If a house fixing feels weak, move it to a stronger spot such as an outside corner where two walls meet. Never underestimate the forces involved; a large sail in 40 mph winds can pull with more than 500 pounds on a single anchor.
Routine Care and Maintenance for Your Garden Sail
A small amount of regular care makes a big difference. Besides checking tension, look over your hardware for rust or wear. Marine-grade 316 stainless steel resists rust well, but in coastal areas it can still show “tea staining,” a brown layer on the surface. A stainless steel cleaner will remove this and keep the fittings looking new.
The fabric also needs cleaning now and then. Dirt, bird droppings, and leaves hold moisture against the cloth, which can lead to mold or mildew. A clean sail allows better airflow through the weave, which keeps you cooler and helps the material last longer.
How to Clean Your Shade Sail Safely
Most HDPE sails can be cleaned while hanging. Use a garden hose on a firm spray to rinse off loose dirt. For stronger stains, mix mild dish soap with lukewarm water. Apply it with a soft brush or sponge, let it sit for about 10 minutes, then rinse well. Do not use a high-pressure washer, as it can damage fibers and remove UV protection.
Avoid strong chemicals like bleach or ammonia, and never put a sail in a washing machine or dryer. For waterproof PVC sails, be very gentle with the coating; rough pads or brushes can scratch off the waterproof layer and cause leaks.
When to Inspect and Tighten Fixings
Check your setup at least twice a year: once in spring when you start using the area more, and once in autumn. Look at all D-shackles and turnbuckles to make sure they are still tight. If any part is pitted, cracked, or badly rusted, replace it with marine-grade hardware.
Also inspect the corners where fabric joins the D-rings. These are high-stress spots and can show fraying or stitching damage over time. Most sails have extra reinforcement here, but years of tension and weather can still wear them down.
Storing and Removing the Sail for Harsh Weather
In areas with snow, you must remove the sail for winter. Shade sails are not built to carry snow loads, which can weigh thousands of pounds. Before storage, let the sail dry fully so mold does not grow. Fold it neatly and keep it in a bag or box in a cool, dry place away from rodents.
When taking the sail down, loosen the turnbuckles first to release the tension. It is often easiest to leave the turnbuckles and pad eyes in place and just unclip the sail’s D-rings from the snap hooks or shackles. This makes putting it back up in spring quicker and simpler.
Frequently Asked Questions About Garden Sail Installation
Installing a garden sail can seem like a big job, but it is one of the most effective ways to improve an outdoor area. Many homeowners ask the same questions about how hard the work is and how long the sails will last. Clear answers can help you feel confident before you begin.
Whether you are worried about doing the work yourself or about the life of the sail, remember these products are made with DIY users in mind. With a few basic tools and a well-thought plan, most people can achieve a clean, professional-looking result.
Can One Person Install a Garden Sail Alone?
One person can install a small sail alone, but it is safer and easier with two people. A helper can hold the fabric off the ground while you attach fittings so it does not get dirty or snagged. Having someone to steady the ladder and assist with the final tension also adds a big safety margin.
If you must work alone, use ratchet straps to hold the corners where you need them while you attach shackles and turnbuckles. This “extra pair of hands” lets you focus on safe fixing instead of wrestling with a heavy, moving sail.
Are Shade Sails Waterproof as Well as Sun-Protective?
This depends on the fabric type. Breathable HDPE sails let water pass as a fine mist, which reduces pooling and helps the sail “breathe.” They give excellent sun protection but only light rain cover. To stay fully dry in heavy rain, you need a waterproof polyester or PVC sail.
Waterproof sails need more care. They must be set at a steep angle to shed water and are more at risk in high winds because air cannot pass through the cloth. For most home gardens, a breathable HDPE sail is usually the more practical and durable option.
How Long Does a Garden Sail Typically Last?
A good garden sail often lasts between 8 and 15 years. How long it lasts depends on fabric quality, how strong the sun is where you live, and how well you look after it. Premium fabrics like Commercial 95 or Monotec often include 10-15-year warranties against UV damage.
To get the longest life from your sail, keep it tight, clean it once or twice a year, and take it down during extreme weather or snow. By avoiding flapping and heavy loads from water or snow, you can keep your sail looking good and working well for many years.
Garden sails also support greener living. By shading windows and walls, they reduce heat building up inside your home, which can lower air conditioning use and cut energy costs. Many modern fabrics are recyclable too, making them a more eco-friendly option than permanent structures that use a lot of timber, concrete, and roofing. Finally, remember that color changes the feel under the sail: light shades like cream or sand create a bright, open space, while darker colors like charcoal or navy give deeper shade and cut glare more in very bright sunlight.